Creating your backend Sertifi portal for Nintex
Your Sertifi for Salesforce account comes with a custom backend portal. In this portal, you can access additional account settings to enhance your workflow within Sertifi for Salesforce. Once you complete the backend configuration, contact your Customer Success Manager, so you can view and manage these additional settings
To create your backend portal:
- Enter Installed Packages in the Quick Find search bar from your Salesforce account.
- Click Installed Packages in the results.
- Click Configure next to Sertifi ESign for Salesforce.com. A popup opens.
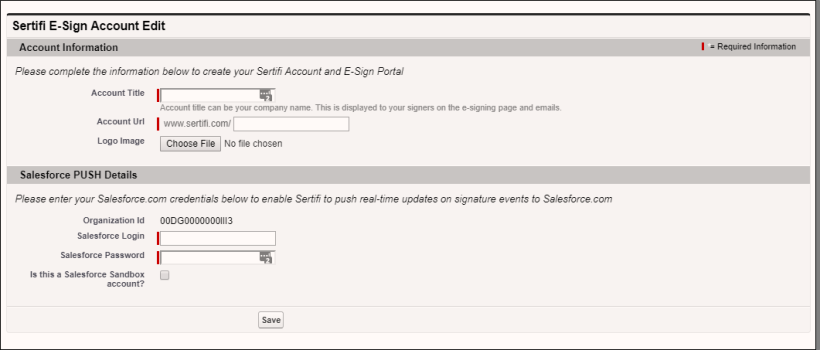
- Enter the following details in the Account Information section:
- Account Title – enter your company name.
- Account URL – enter your company name without spaces. This creates your custom portal URL. You'll use this URL to access your backend Sertifi portal.
- (Optional) Click Choose File to browse your machine and upload your company’s logo. The logo appears on your portal and is visible in your file sends, so all of your messaging is branded appropriately. You can send your logo to your Customer Success Manager to update any time.
- Enter your Salesforce username and password in the Salesforce PUSH Details section.
- (Optional) Click Sandbox if you’re installing the app in a sandbox environment.
- Copy and paste your API code in a separate window.
- Click Save, and then close the popup window.
Your Sertifi Backend portal is now set up. Contact your Sertifi CSM to provide you Super Admin user access.
Next step
Once you complete this step, you can finish your installation by customizing your settings for Sertifi. For more information, see Customizing your settings.

